All of us have tons of pictures somewhere in our home or stuck in our computers. Yesterday, I stumble upon a picture of me nursing my oldest daughter for the first time. My husband who took the picture asked me how it feels when I look at the photograph. Good I said... And a lot of emotions mixed with sadness came up while happy tears ran down my cheeks. Like so many others, this picture means a lot to me but if only I could see a video of this precious moment in life...
Susannah Ludwig a NYC based independent producer recently launched Portraits That Move.
Instead of the usual photoshoot, PTM offers to capture the essence of your children on video. So you can play and replay it forever. Imagine being able to capture their laugh, their sense of humor, their voices and their spontaneity...
I watched the videos that were taken from the different children and there is nothing not to love.
Portraits that move will have a crew of a few people following your child in his/her universe and freeze a moment that you never want to forget.
If you would like to hire the PTM crew or have any question, you can reach Susannah by email at:
Suzlud@gmail.com or by phone at (917)750-0031
Charlie from Portraits That Move on Vimeo.

Sunday, March 9, 2014
Sunday, February 2, 2014
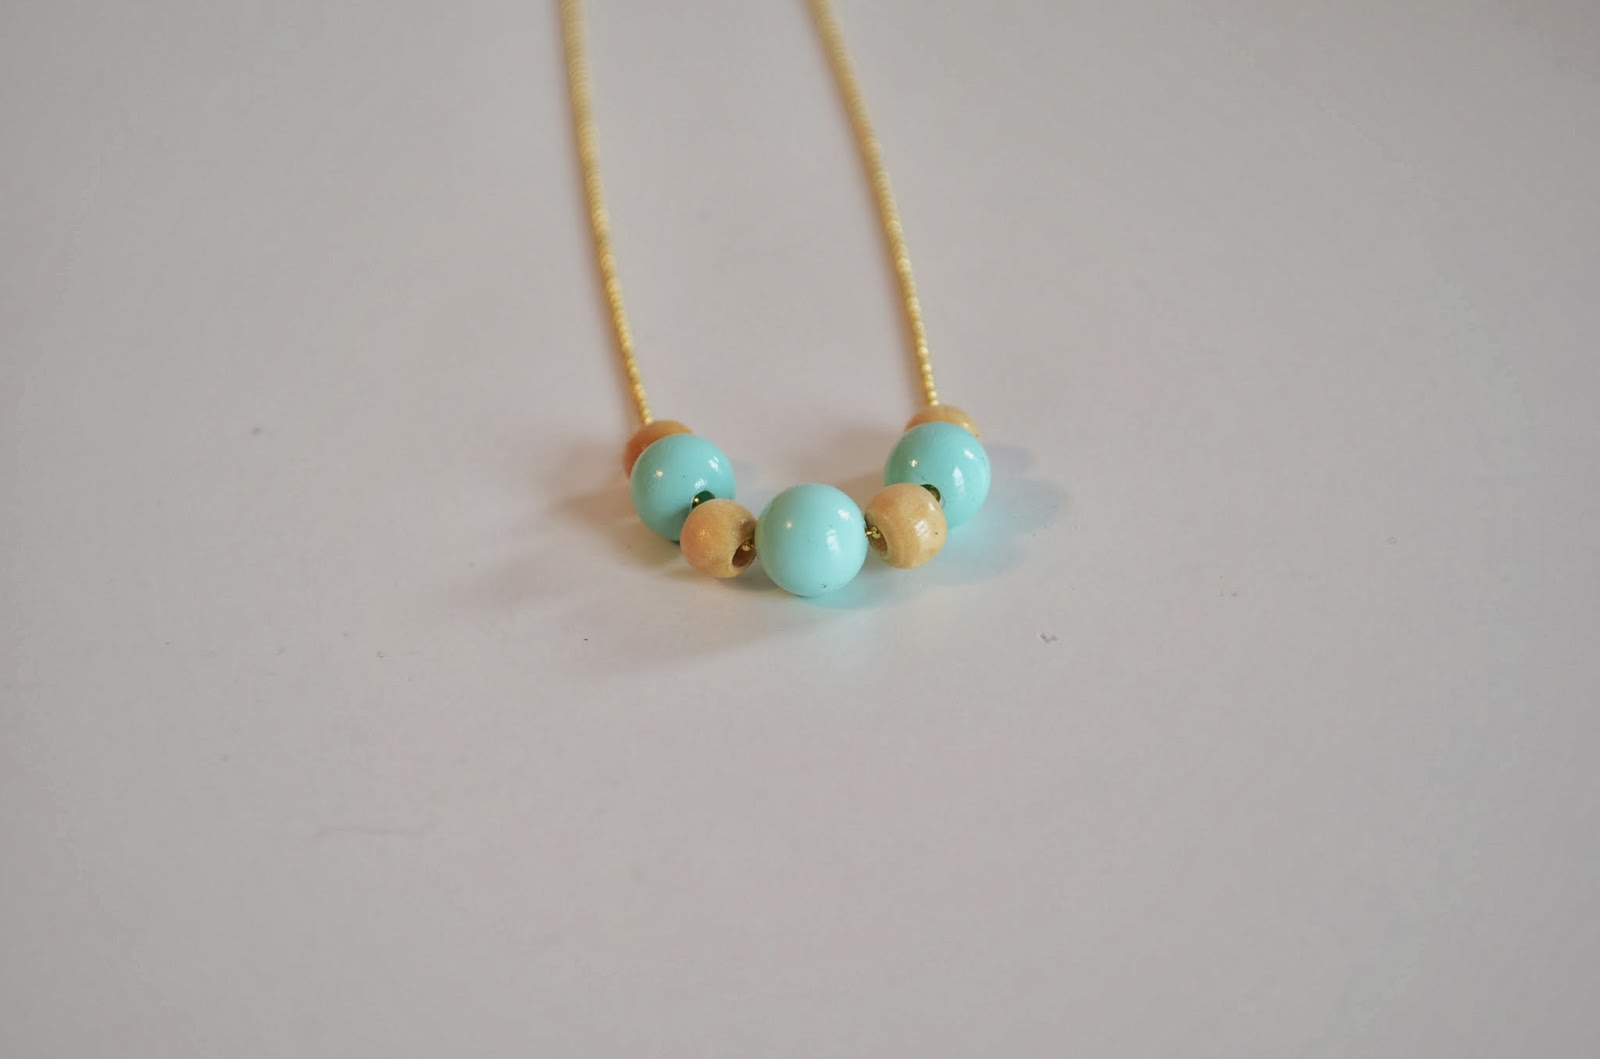
Spring/Summer 2014 jewelry collection is out!
New York has been cold lately and it seems that it's not going to stop anytime soon... So what's best than calling the heat by launching our Spring/Summer jewelry collection?? We cannot wait to see our little ladies out in the sun and finally outdoors!
You can find all the pieces in my Etsy shop.


You can find all the pieces in my Etsy shop.
Obviously!
Friday, January 10, 2014
Emilie Sans Chichi round 2... Seriously!
We all like a good DIY, one that make us feel like :" Really?? I can do that??". I've told it before, I am a big fan of the blog Emilie Sans Chichi and I stick to it. I think that the girl behind it is very talented and has a big heart and no, I've never met her. I just have to read her words about her children and see the passion she puts in her DIY to know that she is one of us the crafters. Here I wanted to share with you the bunny doll she has made for her daughter's 5th b'day. She used a pattern from Lieschen Mueller and created the sweetest doll for her baby girl. I have to equally mention the outfits that she made for the doll. So to the lady behind the fantastic blog, congratulations...you rocked it! If you haven't yet, go discover the world of Emilie Sans Chichi.


Sunday, January 5, 2014
House Crush ... Woodstock Retreat
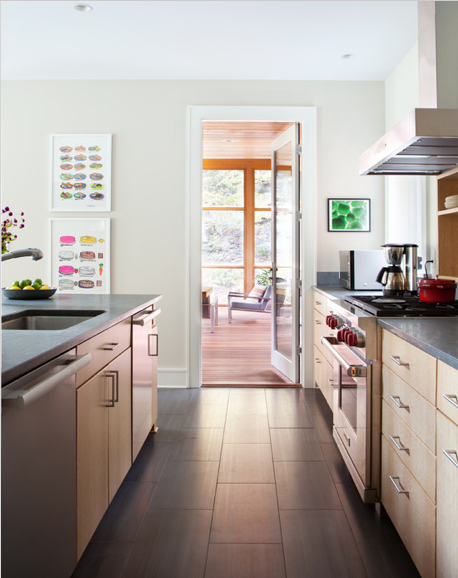
Still searching for my ideal house on the web, I found this house on Houzz.com
A lovely, airy, very well designed house, nestled in one of my favorite places on earth, Woodstock. I love the clean lines and how the light fills up the space. Everything adds up to create a perfectly balanced home.
It was designed by Hall Smith Office in collaboration with CWB Architects in Brooklyn.
Monday, December 30, 2013
New Year's DIY - Wool Felt Garland
This end of year has been very difficult. The 4 of us caught the flu and were very ill for Christmas, so much that we didn't celebrate it. The girls opened their gifts but had no energy whatsoever to play with them :( One week later we still feel like we got hit in the face by a bus but we are certain to be moving to recovering mode. It's been hell but we are going to step into 2014 with a smile and with strength. Today, I created an easy yet beautiful DIY that I can share with you for the new year coming. Enjoy!!


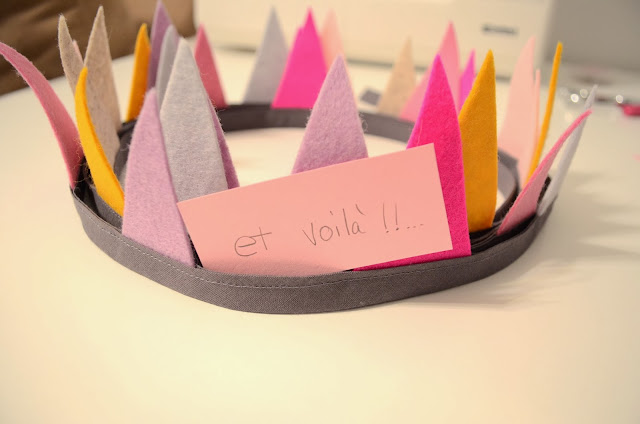


Materials: wool felt (7 different colors), scissors, pins, cardboard templates (triangles), about 10 feet of bias tape. You can use the left overs to make a crown ;)


Tuesday, December 10, 2013
Twiggy and Lou ♥ Mount Royal Mint on Etsy
Making things along the years reinforced my love for other handmade things. So much love and attention goes into the craft you are working on, and no matter how long it takes. We give so much of ourselves that we get attached to what we make. At least, this is how I feel about what I create.
Today, I discovered the work of Mount Royal Mint on Etsy. I already know that a lot of love was used to create these little animals. See for yourself...


Today, I discovered the work of Mount Royal Mint on Etsy. I already know that a lot of love was used to create these little animals. See for yourself...


Subscribe to:
Posts (Atom)